SQLFire the NewSQL Database – Part-II

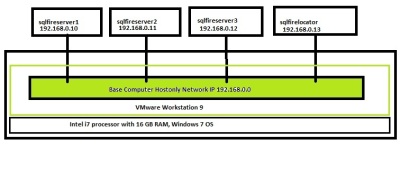
Here is the overall Architecture diagram of the VMs network connection on the Physical Host Machine.

SQLFire-Demo-Setup

  • Prepare the SQLFire Cluster

1.Login to SQLFireLocator (192.168.0.13) with the username and password

$mkdir locator

Start the Locator with the following command.

$sqlf locator start -dir=locator -mcast-port=0 -client-bind-address=sqlfirelocator -client-port=7711 -peer-discovery-address=sqlfirelocator -peer-discovery-port=12345

if everything you have configured correctly then the locator will star as shown in the screenshot.

locator-start

2.Login to the SQLFireServer1 (192.168.0.10) with username and password

$mkdir server1

Start the first server

sqlf server start -dir=server1 -mcast-port=0 -locators=sqlfirelocator[12345] -bind-address=sqlfireserver1 -client-bind-address=sqlfireserver1 -client-port=7712

server1-start

3.Login to the SQLFireServer2  (192.168.0.11) with username and password

$mkdir server2

Start the second Server

sqlf server start -dir=server2 -mcast-port=0 -locators=sqlfirelocator[12345] -bind-address=sqlfireserver2 -client-bind-address=sqlfireserver2 -client-port=7712

Don’t start the third server yet.

Lets create some database tables.

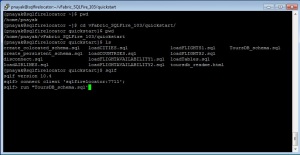
Login to the locator again,I assume you have installed SQLfire on your home directory .For me it is /home/pnayak/vFabric_SQLFire_103,now create the database using sqlf command and running the ToursDB_schema.sql file as shown.

create-db

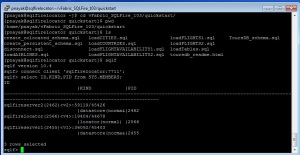
Run this query to see the memebrs in the cluster.

sqlf> select ID,KIND,PID from SYS.MEMBERS;

sqlf> select ID,KIND,PID from SYS.MEMBERS;

ID                                                                                                          |KIND            |PID

—————————————————————————————————————————-

sqlfireserver2(2462)<v2>:59119/45426  |datastore(norma&|2462

sqlfirelocator(2566)<v4>:19404/44678   |locator(normal) |2566

sqlfireserver1(2455)<v1>:36092/45403  |datastore(norma&|2455

sqlf-query1

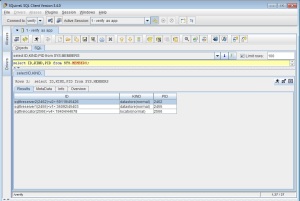
You also can run the same query  using SQuirrel. You can install SQuirrel on the Base Windows 7 OS and run it from there and connect to the Locator and run the query.

SQL GUI Client.

Download the SQuirrel  SQL Client installer jar file from http://squirrel-sql.sourceforge.net and then install  it using java  -jar command.

java -jar squirrel-sql-<version>-install.jar

Run the query via SQuirrel.

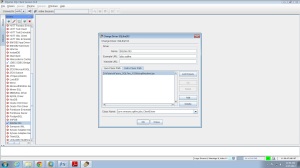
Add sqlfireclient.jar as driver.

add-driver

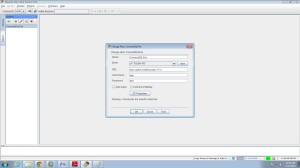
Create the Alias to connect the SQLFire Server Locator.

connect-alias

Now run the Query.

squirrel1

Now let’s load some data to the replicated tables created  on SQLFire Database.

again connect to the SQLfire DB.

sqlf> connect client ‘sqlfirelocator:7711’;

sqlf> run ‘loadTables.sql’;

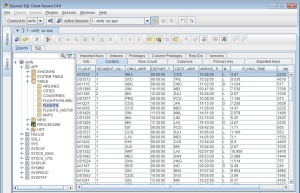
after the execution of the query you can verify it on SQurrel GUI as shown below.

squirrel2

You can execute the query to see the DATAPOLICY of the APP Database.

select TABLENAME,DATAPOLICY from SYS.SYSTABLES where TABLESCHEMANAME=’APP’;

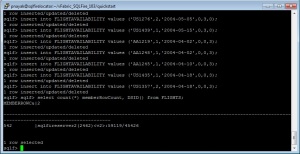
Run the following query to know the number of rows you have in the FLIGHTS table.

select count(*) memberRowCount, DSID() from FLIGHTS;

note the number is 542.

query-count

Now Stop SQLFireserver2.

login to SQLFireserver2 (192.168.0.11)

Execute the following command.

$ sqlf server stop -dir=server2

Now Start third Server

Login to SQLFireServer3 (192.168.0.12)

$mkdir server3

$sqlf server start -dir=server3 -mcast-port=0 -locators=sqlfirelocator[12345] -bind-address=sqlfireserver3 -client-bind-address=sqlfireserver3 -client-port=7712

Finally stop the server SQLFireServer1

login to SQLFireServer 1 (192.168.0.10)

Execute the following command.

$ sqlf server stop -dir=server1

At this point, the servers in SQLFireserver1 and SQLFireserver2  are stopped, and the  SQLFireserver3 is running.

Repeat this command in sqlf to size the FLIGHTS table

select count(*) memberRowCount, DSID() from FLIGHTS;

You can check if the number is same as before i.e 542.

So what we did in the above procedure  ?  Why we stopped and started the servers ? To summarize the process . First we started Servers one and two, loaded data into them then we stopped server 2 ,we started server 3 and joined it to the cluster, then Stooped the server 1.

From the above procedure it was clear that SQLFire servers can be joined to the cluster and removed from the cluster dynamically but data remains  and the locator takes care of connecting to the right existing server in the cluster to retrieve data.

Stop the Cluster

sqlf shut-down-all -mcast-port=0 -locators=sqlfirelocator12345] -bind-address=sqlfireserver1
SQLFire the NewSQL Database- Part-I

Now in this cloud computing world importance is given to data rather than the Compute infrastructure.

Clearly there is a change in database need over the years.

So what is driving this change in database need  ?

Today’s applications are highly distributed and typically web centric and need to support multiple types of devices. They need to be integrated with social and collaborative applications provide real time support to these applications.

So developers are looking for new techniques and technology to support these new applications from data side.

They are looking NoSQL  as an alternative to traditional relational database management systems. They are developing with higher level abstractions and frameworks like the spring framework in Java. Developers are writing applications much more quickly than in the past days of very lengthy product release cycles spanning 18 months to 24 months. Now these cycles have been much more shorter and quick iterations ( 3 months cycle) putting pressure on existing data model.

Also the infrastructure world  evolved quite a lot, it has moved from Physical to virtualized and now into cloud. So all these things driving a lot of change in how do we handle data. Some of the emerging trend of having Low latency ,high performance, real time aspect applications. Those are driving some of the changes in the database layer. Global Distribution, the ability to have data distributed across geographies and regions, data is just no longer silos into a single location or single database platform, high scalability, BigData analytics.

These are some of the trends and requirement that is driving the NoSQL and In-Memory SQL databases. Data management and data retrieval is a key aspect of a successful business.

So today I am going to write about SQLFire ? It is the latest In-Memory/NewSQL Database server from VMware. I have given a table of commercial NewSQL Database servers and open source NewSQL  DB servers.

 Key Commercial Players   geniedb mysql cluster mysql nuodb rethinkdb scaledb sqlfire voltdb
Open Source Databases  mysql clustervoltdb

As a leader of Virtualization technology VMware is also thinking in these direction and developed some DB servers which can scale in a cloud platform and take the advantages of virtualized infrastructure. Thus giving the scalability and performance required for modern cloud based applications.

Database Type VMware Products
Relational Database vFabric Data Director + vFabric Postgres
NoSQL vFabric GemFire
NewSQL,In-Memory vFabric SQLFire
Unstructured/Big Data None today but Grenplum from EMC can be considered

But What is In-Memory /NewSQL Database server ?

To answer this ,let’s consider the speed of memory vs speed of the physical disks. Consider these two facts.

1.The seek time for memory is approximately 200 ns.

2.The seek time of a physical disk is approximately 20,000,000 ns.

So it obvious that if data is present in the memory it can be retrieved 100000 times faster than the data present in the disk. As memory is not a constraint in modern severs  now a days and a server’s can have 1 TB of RAM or even more, so the complete Database can be present in the Memory thus increasing the latency and performance of data retrieval. And we can have a backup of the whole database in a disk for the data to be consistent and present after server restart or server failure.

Another advantage of these In-Memory database is  the distributed nature. The database can be distributed across different servers present across geographies so the data does not travel in the network  as it stays near to to the Application..

So SQLFire is such a Database Server where the whole database resides in the Memory of the Server and can be distributed across physical Servers and geographies ,and in the center of it actually there is a VMware GemFire Server, GemFire is a In-memory ,Highly scalable ,Object based, High Performance data platform.

GemFire  is a NoSQL  DB Server.It does not understand SQL Queries, so to query, insert, modify or retrieve any data you have to do it Programmatically.

Gemfire Plus Apache’s Derby combined to make  a DB Server which understand SQL and one can Query, insert, modify the data using simple SQL language.

In-Memory databases are getting popular day by day because of it low latency performance, fast data access is getting more critical in business.Also when it comes to Horizontal scaling in-memory databases perform and scale linearly.

Today I am going to have a setup for Distributed SQLFire on My Desktop. I am going to create 4 Virtual machines with 3 SQLFire Servers and one SQLFire Locator.

This is going to be a perfect demo of how SQLFire works in a distributed environment and how Database Servers can be dynamically added and removed from a cluster of In-Memory Database Servers.

I am going to use CentOS this time for the Distributed SQLFire Setup.

1.Lets create a Virtual Machine template with CentOS, Java and SQLFire installed on it.

First I ll install CentOS linux on the VM created using VMware Workstation.

Steps To Create a CentOS VM Template :

1. Download CentOS from centos.org or from one of the mirror site.

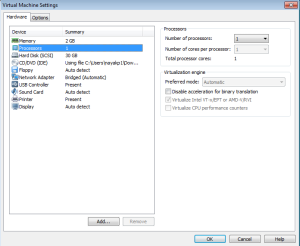
2.Create a VM with 1 vCPU ,2GB RAM and 1 Network interface.

3.Install CentOS on it.

4.Set the network adapter to Host only. (Network address 192.168.0.0)

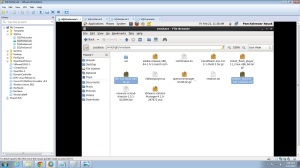
5.Create a Sharable Directory on your Base Windows OS,I call it “G:\VMshare” ,so that you can copy your files from the base Windows OS and Linux VMs.

CreateVM

5.Download Java for Windows and Linux from Oracle. Download SQLFire from VMware,download SQuirreL SQL Client to execute DB Queries.

6.Copy Java installer for Linux OS and the SQLFire installer to the sharable Directory.

7.Copy the Linux Java Installer and SQLFire Installer jar file to your Home directory on CentOS.

Shared-folder

8. Install Java on CentOS

9.Set the PATH and CLASSPATH environment variables on your .bashrc file for java installation.

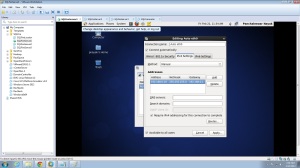
10.Set the Network for the VM. i.e 192.168.0.10

SQLFire1-IP

Set the hostname for the VM by editing the /etc/sysconfig/network file.

#vi  /etc/sysconfig/network

HOSTNAME=sqlfireserver1
Edit the /etc/hosts file and enter the hostname and IP address of each VMs to be created.

#vi /etc/hosts

192.168.0.10          sqlfireserver1

192.168.0.11          sqlfireserver2

192.168.0.12          sqlfireserver3

192.168.0.13          sqlfirelocator

11.Install SQLFire on the VM.

$java -jar SQLFire-jar-installer -file.jar

12.Setup the PATH variable for SQLFire.

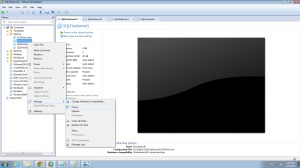
13.Now shutdown the VM and make 3 Clones of the VM as shown in the screenshot.

clone

14.After you finished the cloning, power on the Cloned VMs and modify the hostname and the network address (IP address) of each VM.

HOSTNAME=sqlfireserver1

HOSTNAME=sqlfireserver2

HOSTNAME=sqlfireserver3

HOSTNAME=sqlfirelocator

#vi /etc/hosts

192.168.0.10          sqlfireserver1

192.168.0.11          sqlfireserver2

192.168.0.12          sqlfireserver3

192.168.0.13          sqlfirelocator

15.Ping test of each VM communication ,make sure all the VM communicates with each other.

16.At this point I ll recommend to disable the firewall on each VM ,as this is a Host only network so you are safe inside your host machine.

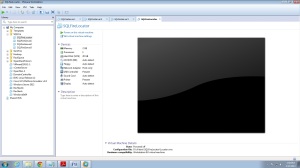
Now you are ready with 4 VMs with SQLFire installed on each VM.

4 VMs

Tomorrow I am going to write how to use these VMs and configure and Start the SQLFire Database server.

Multi Node OpenStack Cloud Platform

Well today I am going to write about how can we install a Multi node OpenStack Cloud,Before installing it yourself I recommend to have  a first hand experience of how OpenStack work in a muti node environment by using some OpenStack distribution. Openstack distribution is like a ready made package to be installed from an iso image,just install and use it.

Its like getting Linux Distribution from Redhat. So how Redhat is from Linux similarly openstack distribution “Alamo” is from Rackspace.You can get openstack distribution “Alamo” from Rackspace.

There are a lot of openstack distribution available in the market now.

So first I ll write how to install and implement Rackspace’s Openstack Distro “Alamo” in your home Desktop.

You can download the Private Cloud Software from the following page

http://www.rackspace.com/cloud/private/openstack_software/

OpenStack Cloud Platform Installation

Today I am going to write about the OpenStack Implementation on a Desktop.

I saw many earlier blogs and post on openstack implementation but I didn’t find any comprehensive details about how can I implement openstack on my own.Off course there some official documentation on openstack Getting Started Page.But still it is not clearly mentioned how can I start learning on a desktop.

So I started my own implementation on my Desktop.Here is my Desktop Configuration.

I have i7 Processor ( 4 Cores and 8 Threads),16GB of RAM,Windows 7 OS and I have VMware’s Workstation installed on it Off course you don’t need such a high configuration to install openstack,

But if you want to implement the Multi Node openstack configuration then probably having a such a configuration will help.

I ll try to make it as simple as possible and as detailed as possible so a new learner can implement it.

First I ll try to create the devstack implementation which is a simple process of implementing and learning different aspect of openstack.

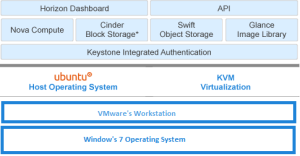
Here is the Complete Architecture of the Single Node OpenStack implementation on a Desktop.

Desktop-Arch

1.1 Create a Virtual Machine on your Desktop.

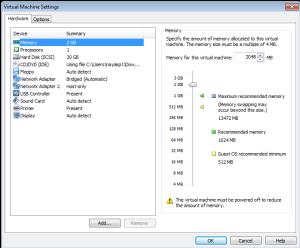
Create a new VM on VMware Workstation with 1 vCPU and 2 GB RAM,I assume you know how to create a VM on Workstation.Make sure while creating the VM you enable the “Virtualiza Intel VT-x or AMD-V/RVI” option for the processor.While creating the VM don’t select the OS,So that you can install it after VM creation.

CreateVM

1.2 .Make sure you have the network connection so that you can connect to internet.Connect the network adapter to “bridged” so that you can use your existing Router network and use internet.In my case my route network is 192.168.1.0.

network

1.3 .Download the Minimal Ubuntu OS from here https://help.ubuntu.com/community/Installation/MinimalCD,Download 64 bit Ubuntu 12.04 “Precise Pangolin” Minimal CD.Now install this on the newly created VM it ll be download and install all the required minimum packages needed for Ubuntu 64 12.4 Linux OS.

2.VM Network and Devstack Install Local Configuration.

Set the Network Configuration edit the file  /etc/network/interfaces as following. Make sure you set the dns-nameservers 8.8.8.8 or you may face problem during devstack installation.Particularly your devstack installation will hang at the following message.

———————————–

Requirement already satisfied (use –upgrade to upgrade): prettytable in /usr/lib/python2.7/dist-packages (from -r python_keystoneclient.egg-info/requires.txt

Downloading/unpacking httplib2>=0.7 (from -r python_keystoneclient.egg-info/requires.txt (line 1))

————————————-

auto eth0
iface eth0 inet static
address 192.168.1.110
netmask 255.255.255.0
network 192.168.1.0
gateway 192.168.1.1
dns-nameservers 8.8.8.8

auto eth1
iface eth1 inet manual
up ifconfig $IFACE 0.0.0.0 up
up ip link set $IFACE promisc on
down ip link set $IFACE promisc off
down ifconfig $IFACE down

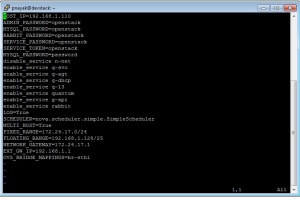
Create a localrc file in your home directory and edit it as follows

localrc

Download and Install Devstack as follows.

$sudo apt-get install git -y
$git clone git://github.com/openstack-dev/devstack.git

Start the instaltion

$cd devstack
$./stack.sh

This ll install and configure complete devstack.

Now you can access the devstack console from a web browser with

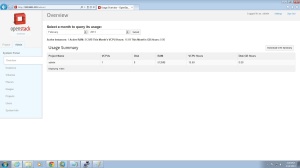
http://192.168.1.110/ (my devstack IP address is 192.168.1.110) you can access this from your host desktop. Login with admin/password

devstack-login

Tomorrow I ll write the how to install  and configure the Multi Node OpenStack.